Placemark Manager
| Management > Placemark Manager |
A placemark is a 2D icon or 3D model used to represent a device or user object in NUCLEUS, and a placemark is compulsory when you add a device or user object. NUCLEUS has a library of built-in placemarks for you to select, and the Placemark Manager allows you to add, edit and delete the placemarks in the library if you are an Administrator.
In the Placemark Manager, there are two tabs: 2D Icon and 3D Model, which respectively lists the library of 2D and 3D placemarks; as illustrated below, the placemarks are grouped by the category that they belong to. When you choose a placemark for a device or user object. the placemark images are displayed and grouped by these categories.
Each placemark has a name as well as an image to represent it. You can click the  button to edit an existing placemark, or click the
  button to delete it.
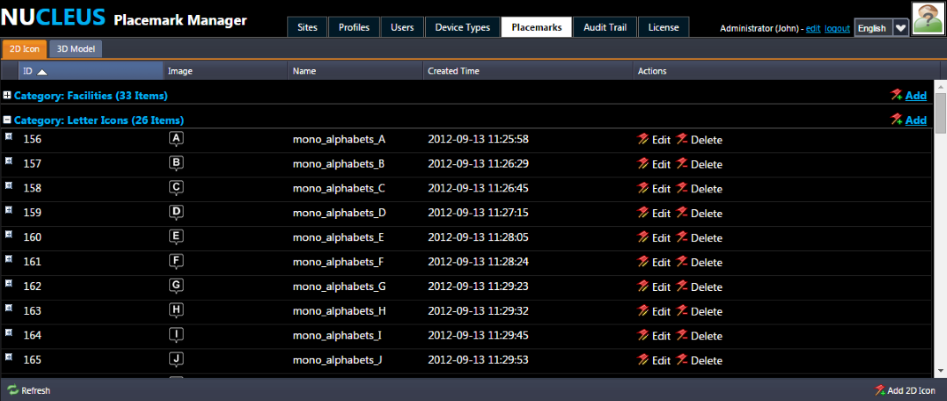
For updating an existing placemark, you are allowed to change its name, category, source file and text description. In general, the source file for a 2D placemark is a .png file, while the source file for a 3D placemark is a .dae (COLLADA) file.
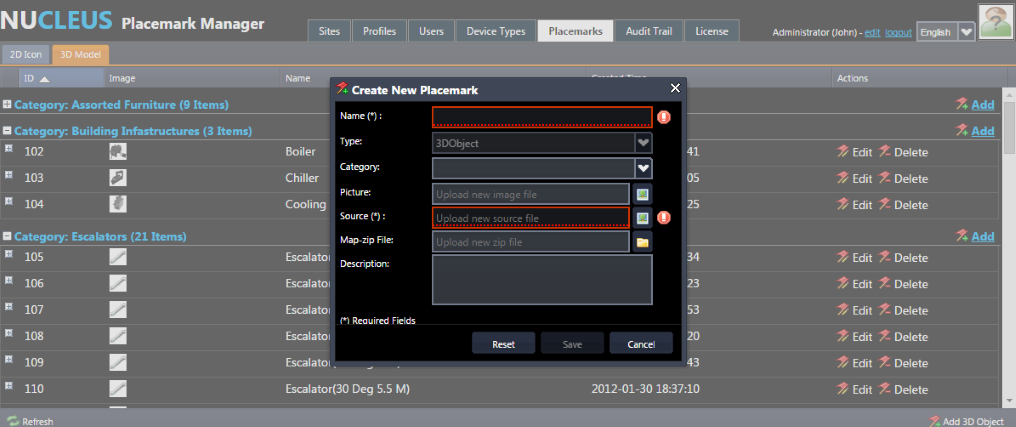
To add a 2D placemark, click the "Add 2D Icon" button under the "2D Icon" tab, then a window will appear as illustrated below.
![]()
In this window, you need to:
After the above four steps, you can click "Save" to finish the adding. Alternatively, you can click "Reset" to clear up your input or click the "Cancel" to cease the adding saving.
In addition to adding a 2D icon placemark, NUCLEUS can use the origin and scale specified COLLADA file as well. After uploading your own COLLADA file and use it as a placemark for a device or user object.
To add a 3D model, click the "Add 3D Object" button in the "3D Model" tab; then, a window will appear, as shown below.
In this window, you need to:
Click "Save" to finish the adding. Alternatively, you can click "Reset" to clear up your input or click "Cancel" to cease the adding without saving.
 |
When you use the uploaded 3D model: 1. if you find that the model does not appear where you are clicking, use a 3D modeling package to edit the COLLADA file. Edit the model so that its origin is where you want the model to appear when the operator clicks in the 3D scene. For example, for a car model, edit it so that its origin is on the ground between its 4 wheels. 2. if you find that the 3D model is too large or too small, please check the scale of the COLLADA file and ensure that the model size is physically correct. A common mistake is to swap millimeters for meters, in which case the model will appear 1000 times too large or too small. |